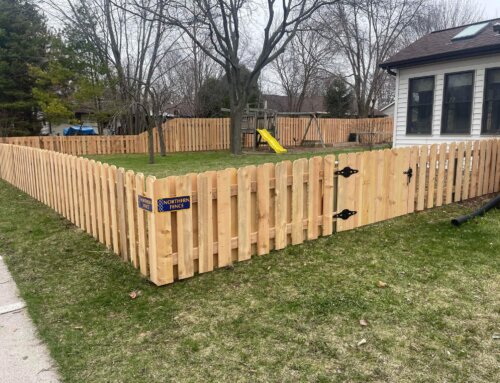
Guide to Installing Fences
Your home or business’ fence is more than just a boundary for your property. A fence offers all the benefits of protection from wildlife, intruders, harsh weather, and noise. A well-constructed privacy wood, vinyl, chain link, or wrought iron fence is keyto maintaining the seclusion of your property.
In this complete guide to installing a fence, you’ll need to know that a fencing project requires effort and knowledge on the part of the property owner.
Here’s our simplified guide to keep you informed and help you get started!
1. Research Local Regulations & Property Lines
To start, you’ll need to keep the following in mind:
- Understand Local Laws: Consult with your local city, neighborhood association, or homeowners’ group for specific fencing rules. Regulations may include restrictions on height, materials, and style.
- Property Lines: Accurately determine your property boundaries using your home’s plat map. If unavailable, request a copy from your county’s clerk or surveyor. This step is crucial to avoid encroaching on neighboring properties.
- Neighborly Courtesy: Discuss your fencing plans with your neighbors. This fosters good relations and helps avoid potential conflicts over blocked views or aesthetics.
2. Choose Your Fence Type
Once you’ve taken the time to understand local laws and you have determined your property’s boundaries, you’ll need to consider your fence type choice:
- Material & Style Selection: Explore various materials like wood, vinyl, or metal, and styles that fit your home’s architecture and your privacy needs.
- Panel Considerations: If opting for prefabricated panels, assess the available sizes and styles. This choice influences the overall look and the quantity of materials needed.
We cover more about choosing the right fence for your home in our article here.
3. Measure & Outline Your Fence
The next step to installing a fence is to take measurements. If you’re not comfortable with this step, please contact the fence installers at Northern Fence and we can assist:
- Comprehensive Measurement: You’ll want to use a measuring wheel for accuracy, especially for large perimeters. Mark the fence line with spray paint or chalk, clearly indicating gate placements.
- Panel and Post Calculations: Subtract gate lengths from the total fence length to determine how many panels you need. Divide the fence length by post spacing (typically every 6-8 feet) to calculate the number of posts required.
4. Assemble Your Tools & Materials
Make sure you (or your fencing contractor) has the following tools and materials available for the fence installation process:
- Essential Tools: Gather a post hole digger, hammer, power drill, tape measure, level, and suitable safety gear.
- Materials: Purchase the required amount of fence panels, posts, nails, screws, and concrete mix. Choose quality materials for longevity and ease of maintenance.

5. Dig Holes & Set Fence Posts
Your fencing contractor will then perform the digging and setting of the posts:
- Post Hole Digging: Dig holes deep enough to support the posts (usually one-third the post’s height). Use caution to avoid underground utilities.
- Setting the Posts: Fill the hole’s bottom with gravel for drainage, then add concrete. Place the post, ensuring it’s level and straight, then let the concrete cure as per instructions.
More on how to install a fence post here.
6. Install Fence Rails
The next step of the fencing installation process is to install the fencing rails:
- Rail Placement: Rails provide structural support and are typically placed at the bottom, middle, and top of the fence.
- Securing Rails: Attach rails to posts using screws or nails, ensuring they are level and evenly spaced for a uniform appearance.
7. Attach Pickets or Panels
Your fencing contractors will perform the picket or panel installation for your fence. The installation is almost complete!
- Picket Attachment: If using individual pickets, attach them to the rails, maintaining even spacing for a neat appearance.
- Panel Installation: Panels offer a quicker installation. Attach them to the posts, ensuring they are level and securely fastened.
- Removable Panel Option: Consider a removable panel for large item access, ensuring it can be securely reattached.
8. Install the Gate (if applicable)
Lastly, if applicable, your fencing contractors will install the gate. Here are the steps to follow:
- Gate Post Installation: If not already done, install gate posts as you would fence posts.
- Hinge & Lock Installation: Carefully measure and predrill for hinge placement. Attach the gate to the posts, then install the locking mechanism following the manufacturer’s instructions.
More information here about how to how to build a fence gate.
Complete Guide to Installing a Fence: In Conclusion
If you are a DIYer, we hope this guide to fence installation has been helpful for you to install your wood, vinyl, or chain link fencing.
Always remember that the installation of a fence is not just about building a barrier. It’s also about enhancing your home’s privacy and aesthetic appeal. Make sure you and your fencing contractors’ efforts align with your home’s overall look and feel.
Contact Northern Fence for Fence Installations!
Why choose Northern Fence for fence installations? With more than three decades since our company was founded in 1990, we have been dedicated to the installation and replacement of wood, vinyl, chain link, and wrought iron fences. We are committed to quality in the work that we do, and our Google reviews demonstrate this.
To get started with Northern Fence, please contact us for a FREE estimate, or give us a call and we’ll be in touch as soon as we can. Our fencing installation contractors serve Appleton, Green Bay, and the Fox Cities.
Questions? Contact our team today!


